
How to Set Up a Stable Frag Tank for Growing Healthy Coral Frags
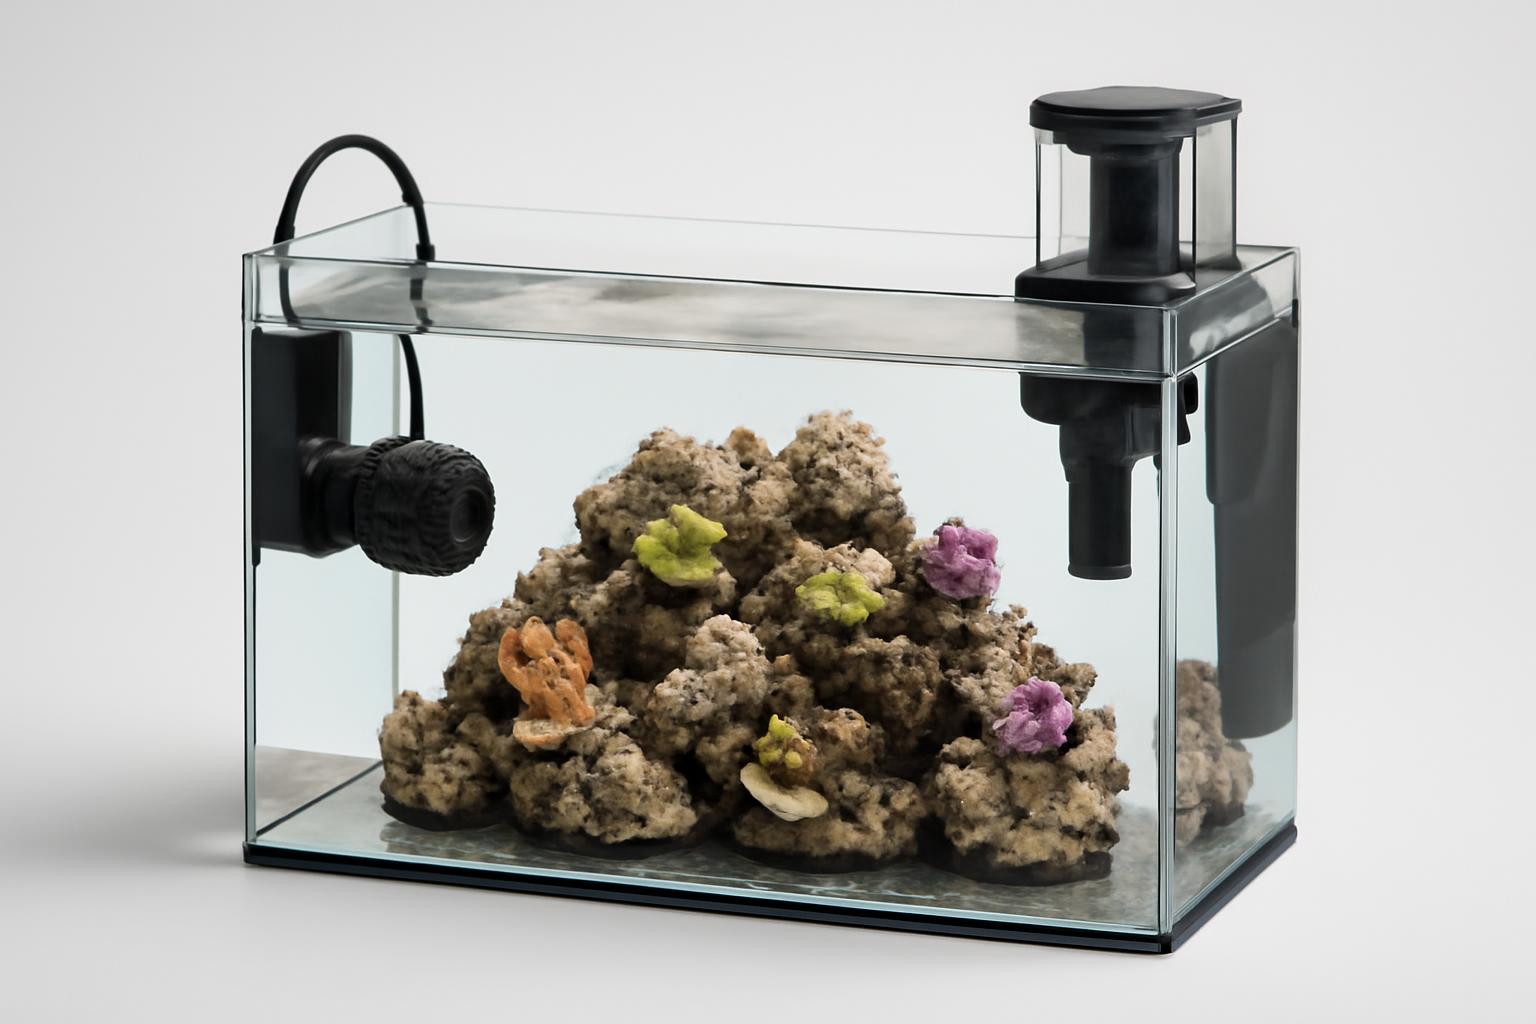
A separate aquarium lets coral pieces heal and grow outside the display. For beginners, 10-20 gallons suits a few frags. Shallow 20-40-gallon systems add stability.
You are not building a rockscape-first showpiece. You are building a working system where coral frags can heal, grow, and tell you quickly whether your husbandry is actually consistent.
That difference matters. A frag tank usually cannot. That is why the safest beginner mindset is still parameters first, livestock second—the same general sequence used in Reef Directory’s reef setup guidance and consistent with the site’s editorial policy stating that it does not sell equipment or accept sponsored posts.
Related: Saltwater Aquarium Water Parameters: The Numbers That Keep Coral Alive.
What Is a Frag Tank and Why Use One?
A frag tank is a dedicated aquarium for coral fragments rather than a display-first reef. In beginner-oriented reef guidance, it is usually described as a smaller system built specifically for growing and propagating coral pieces outside the main display so they can heal, stay organized, and grow under more controlled conditions (Extreme Corals beginner guide).
In practical terms, that separate system can serve several purposes at once:
- hold fresh cuts while they heal
- grow out small pieces before they enter a display
- keep backup frags from valuable colonies
- prevent the main tank from filling up with racks and spare plugs
- let you observe how corals respond to flow, light, and placement without as much visual clutter
For beginners, the biggest advantage is not productivity. It is feedback.
Most frag tanks are also designed for function rather than decoration. They are commonly shallow, easy to reach into, and easy to light evenly. That does not make shallow the only valid approach, but it does explain why frag systems are so often built around access, visibility, and maintenance rather than height or aquascape drama.
Ideal Frag Tank Sizes and Shapes for Beginners
For most beginners, the best frag tank is not the absolute smallest system that can technically hold coral. It is the smallest system that still gives you a little room to recover from mistakes.
A practical beginner range is 10–20 gallons if you plan to keep a small number of frags and want to limit cost, while 20–40 gallon shallow systems usually offer more stability and more working room (Extreme Corals beginner guide). The tradeoff is straightforward: small tanks are cheaper and easier to place, but they react faster to evaporation, missed top-off, overfeeding, and dosing errors.
That makes the beginner choice fairly simple:
- 10–20 gallons: workable for a small number of starter frags, but less forgiving
- 20–40 gallons: usually easier to stabilize and easier to work in
- larger shallow systems: useful if you already know you want more grow-out space, but not necessary to learn the basics
In hobby discussion about beginner frag systems, lowboy and breeder-style tanks come up repeatedly because they prioritize spread-out workspace over vertical depth and make detritus easier to see and siphon (Bay Area Reefers frag tank discussion).
For actual dimensions, the strongest beginner-friendly rule is not a magical number but an access test: you should be able to reach the bottom, retrieve a fallen plug, and clean the far corners without turning every maintenance session into a shoulder-deep chore. In one frag-tank recommendation thread, hobbyists specifically advised keeping height to 16 inches or less and front-to-back depth to 24 inches or less for ease of use; treat that as practical hobby guidance, not an immutable rule (Atlanta Reef Club frag tank thread).
Essential Equipment for Frag Tank Setup
A beginner frag tank does not need an exotic equipment stack. It does need each piece of gear to do a specific job reliably.
Start with these core functions:
- a shallow tank with enough footprint for racks or plugs
- reef-capable lighting with output appropriate for the corals you plan to keep
- a heater that can hold steady temperature
- internal flow from at least one powerhead or wavemaker
- biological filtration and some basic mechanical filtration
- accurate salinity measurement and test kits for the chemistry you plan to manage
- saltwater mixing and top-off supplies
Lighting gets the most attention, but for a beginner frag tank the key question is not “What is the hottest fixture?” It is “Can I keep intensity and spread consistent over the rack area?” Beginner-oriented frag guidance commonly recommends LED lighting because it is efficient and adjustable, but the larger point is consistency and match: soft corals and forgiving LPS do not need the same intensity profile as a future SPS system. If the light can be set, repeated, and spread evenly, it is doing the real job.
Filtration should solve problems, not create complexity. Your system needs somewhere for beneficial bacteria to live, some way to catch suspended debris, and enough gas exchange to keep the water healthy. That can be done simply. You do not need to build a miniature coral farm on day one.
A useful beginner distinction is essential versus optional equipment:
- Essential: heater, flow, lighting, salinity measurement, test kits, biological support
- Optional at first: protein skimmer, elaborate dosing setup, specialized reactors
- Condition-dependent: extra export or automation if stocking, feeding, or evaporation outgrows your manual routine
Skimmers are a good example. They can help with aeration and nutrient export, but hobbyist reports from coral-only frag systems also describe successful setups without them when biofiltration, flow, and maintenance are kept simple and consistent. In those same discussions, air stones are mentioned as another way to boost aeration, though with the downside of extra salt spray (Reef2Reef dedicated frag tank discussion).
Flow is not optional. In a shallow tank, the goal is usually broad coverage rather than one harsh jet. A frag tank with “lots of flow” but obvious dead spots under the rack is still poorly set up.
Testing equipment is where many beginners get into trouble by trying to save too much. In a frag tank, you are watching a small, responsive system. If you cannot measure salinity and track major chemistry with confidence, you are not really managing the tank—you are guessing.
Stabilizing Water Parameters Before Adding Frags
Before the first coral goes in, the tank should already be uneventful.
That means the cycle is complete, the heater is holding, evaporation is under control, and your major parameters are behaving predictably rather than bouncing around. Reef Directory recommends adding the first coral frag only after salinity holds at 1.025–1.026, alkalinity at 8.3–9.0 dKH, calcium at 400–450 ppm, and magnesium at 1250–1350 ppm for two straight weeks (Reef Directory setup guidance, Extreme Corals also emphasizes that smaller tanks swing faster and that stability matters more than chasing perfect one-off readings).
That second point is the one beginners usually remember longest: stable “good enough” beats unstable “perfect.” A tank that touches the target range once is not ready. A tank that stays inside a reasonable range, day after day, is.
For a beginner frag tank, stabilization usually comes down to boring habits:
-
Top off evaporation consistently. In a shallow system, evaporation can move salinity quickly.
-
Test on a schedule. Testing only when coral looks bad means you learn after the fact.
-
Mix replacement saltwater the same way each time. Consistency in preparation helps create consistency in results.
-
Do not confuse “cycled” with “stable.” Ammonia and nitrite reaching zero is necessary, but it is not the whole readiness test.
-
Watch for consumption after coral is added. Even beginner corals can gradually increase demand for alkalinity, calcium, and magnesium.
Patience matters here because a frag tank amplifies shortcuts. Reef Directory’s homepage also frames 6–8 weeks as a minimum cycle period before livestock in a no-shortcut reef setup, which helps explain why rushing from wet tank to coral purchase is such a common beginner mistake.
Filtration and Flow in a Frag Tank
Frag tanks often look simple, but simple is not the same as unfiltered.
If you want to run a coral-focused or coral-only frag tank, biological media becomes especially important because the tank may have very little rock and limited fish waste. In hobbyist reports on dedicated frag systems, reef keepers describe using items such as bioballs, cubes, ceramic-style blocks, or calcium-reactor media as bacterial surface area in coral-only tanks, while treating skimmers as optional rather than mandatory (Reef2Reef dedicated frag tank discussion).
For a beginner, the filtration stack usually needs only a few jobs covered:
- biological support: surface area for nitrifying bacteria
- mechanical capture: something to trap suspended debris before it breaks down
- aeration: enough gas exchange to avoid stale, low-oxygen water
- manual export: siphoning, blowing detritus off racks, and cleaning dirty surfaces
That last part is easy to underestimate. Frag tanks reward visible cleanliness, but they do not stay clean by equipment alone.
Flow deserves extra attention because many frag tanks are bare bottom or mostly bare bottom. In that kind of layout, the practical aim is to keep detritus suspended long enough to be removed rather than letting it settle under racks, plugs, or egg crate. In forum discussions of lowboy frag systems, hobbyists repeatedly describe using strong, distributed flow for exactly that purpose, while accepting that some dead spots will still need manual siphoning. That is best understood as common hobby practice rather than settled science, but it is sensible practice.
A good beginner flow target looks like this:
- broad movement across the rack area
- enough turbulence to keep surfaces from going stagnant
- no single narrow blast directly stripping tissue from a nearby frag
- easy visual identification of dead spots where detritus still settles
The question is not whether the pump is “powerful.” It is whether the whole working area stays clean enough for coral, plugs, and racks to avoid becoming nutrient traps.
As for bare bottom versus sand, bare bottom is common because it makes waste easier to see and remove. It is not the only valid choice. Some hobbyists still use sand partitions or mixed-bottom sections, especially if they want to keep fish with specific substrate needs. For a first frag tank, though, bare bottom remains a common beginner-friendly option because it simplifies cleaning.
Stocking Sequence: From Cleanup Crew to Corals
The safest beginner stocking plan is slow, staged, and a little boring by design.
Reef Directory’s setup sequence is straightforward: cleanup crew first, then a single hardy fish, then coral frags, with weeks between additions so the system can absorb each increase in bioload (Reef Directory setup guidance). That sequence is not about ceremony. It is about reducing the number of moving parts you introduce at once.
1. Start with a cleanup crew
A modest cleanup crew is therefore a logical first addition.
The most useful beginner choices are usually simple grazers:
- trochus snails
- a few other reef-safe snails suited to the algae you are actually seeing
- small hermit crabs, if you accept their usual tradeoffs
- in some setups, a more specialized grazer such as a tuxedo urchin, though that is not essential for a beginner system
The goal is not to dump in an oversized “cleaning army.” It is to add enough grazers to start passive algae control without overshooting what the tank can naturally feed. In hobby reports from coral-only frag systems, some cleanup crews have lived mainly on film algae and biofilm without active feeding, but that depends on how much natural growth the tank actually produces. If the tank stays too clean, the crew may need supplemental feeding or reduced numbers.
2. Add one hardy, purposeful fish only if the system needs one
A fish is optional in a frag tank.
Some reef keepers prefer a coral-only system with inverts and biological media. Others like one fish because fish waste provides steady nutrient input and makes the system feel less sterile. Both approaches can work. The difference is management.
- fishless: simpler bioload, but nutrients may become too lean
- with one fish: easier nutrient input, but more feeding, more waste, and more jumping risk
The beginner mistake is treating “optional fish” as permission to stock a shallow frag tank like a display. It is not. One fish is enough to test whether you actually want the added maintenance.
It is also worth remembering that not every reef-safe fish suits a small frag system. For example, Reef Directory’s guide to the yellow coris wrasse describes a fish that typically needs a larger established tank, fine sand, and a tight lid—traits that rule it out for many shallow beginner frag tanks. Even smaller species such as the pink-streaked wrasse still need mature conditions, rock shelter, and a covered aquarium.
3. Add corals last, and start easy
Corals should be the last major addition, not the first reward for filling the tank.
Begin with forgiving corals rather than delicate SPS. Extreme Corals’ beginner frag guidance recommends starting with soft corals such as zoanthids, mushrooms, leather corals, clove polyps, and xenia, then moving to hardy LPS such as candy cane or duncan once the system has proven stable. The same guidance advises beginners not to start a frag tank with SPS.
That gives you a sensible early sequence:
- best first corals: zoanthids, mushrooms, easy leathers
- next step: hardy LPS after the tank has stayed stable
- leave for later: SPS, especially in small or newly established systems
Spacing matters too. A frag tank can make you feel organized because every plug has a neat place on a rack, but that visual order can hide overcrowding. Leave room for growth, siphon access, and flow between pieces. If you cannot clean around a frag easily, you probably placed it too tightly.
Daily and Weekly Maintenance Routine
The easiest way to keep a frag tank stable is to make maintenance small, frequent, and routine.
A general reef-maintenance guide from Reef Builders divides the work into daily, weekly, and longer-interval tasks and emphasizes doing small jobs often rather than letting them pile up into one disruptive cleanup day (Reef Builders maintenance guide). That approach fits frag tanks especially well because small systems respond quickly to neglect and to overcorrection.
Daily
- top off evaporated water
- check temperature and equipment operation
- look at coral extension, tissue condition, and fallen plugs
- clean visible film from glass if needed
- feed fish only as required for the livestock you actually keep
- remove any obviously decaying material
Daily work should be fast. Its purpose is early detection. If a heater is drifting, a pump is failing, or a frag has tipped into a dirty corner, catching it today is easier than correcting the compounded problem a week later.
Weekly
- test salinity and the major chemistry you plan to maintain
- check nitrate and phosphate often enough to understand the trend
- change water
- clean or replace mechanical filtration
- clean the skimmer cup if you use one
- blow detritus from racks and siphon the waste out
- inspect plugs for nuisance algae and unwanted hitchhikers
This is where bare-bottom layouts show their advantage. Waste is easier to see, easier to move, and easier to remove. That does not make sand wrong; it just makes visible housekeeping simpler in a system designed around plugs and racks.
Monthly and as needed
- clean pump and powerhead intakes
- remove salt creep
- inspect heaters, cords, and any top-off hardware
- thin overgrown soft corals before they shade neighbors
- reorganize racks if colonies begin to touch
The main beginner lesson is that frag tanks respond better to many small corrections than to infrequent “deep cleans.” A huge cleanup session often means large changes in chemistry, flow, and physical disturbance all at once. Small scheduled tasks are gentler on coral and easier for you to repeat.
Common Frag Tank Challenges and Fixes
Frag tanks are simple, but they are not self-correcting. Their strengths—small size, visibility, accessibility—also make problems show up fast.
Algae on plugs, racks, and glass
This is one of the most common beginner complaints, and it usually points to balance rather than mystery.
In a frag tank, plugs and racks multiply the available attachment points. The fix is normally a combination of:
- an appropriately sized cleanup crew
- better flow across problem areas
- less trapped detritus
- more consistent water changes
- more restrained feeding
- time for the tank to mature
That is why algae is often a husbandry signal rather than a standalone problem. If it keeps returning to the same rack corner, ask what that corner is collecting.
Parameter swings
This is the price of small, shallow systems. Salinity can drift quickly when evaporation is missed. Alkalinity can move noticeably after a water-change inconsistency. Coral growth can slowly raise demand for calcium and magnesium until yesterday’s easy routine no longer matches today’s consumption.
If the tank is fishless, nutrient control can become a separate challenge. In hobby discussions of coral-only frag systems, some reef keepers describe dosing nitrate or phosphate when the water becomes too stripped, and some mention supporting pods with phyto as part of a more deliberate micro-ecosystem approach. Those are real hobby practices, but they are not beginner shortcuts; they require measured testing and restraint, not guesswork (Reef2Reef dedicated frag tank discussion).
For most beginners, the safer move is modest, trackable nutrient input and gradual adjustments rather than dramatic corrections after the system bottoms out.
Pests and poor healing after fragging
A frag tank makes inspection easier, but it does not make pests impossible. New plugs can bring algae, flatworms, or other unwanted hitchhikers. Fresh cuts can also fail to heal if the tank is unstable.
The fundamentals remain basic:
- use clean, sharp tools
- minimize rough tissue handling
- place fresh cuts in stable, moderate flow
- avoid abrupt lighting changes right after cutting
- inspect incoming frags before they join the rack
Overcomplicating the system
This is one of the most preventable beginner problems. Because a frag tank looks simple, many people assume they should make it more ambitious to justify having one. That often leads to too many frags, too many experiments, too much feeding, or too much equipment before the tank has even demonstrated consistency.
You do not need a commercial-looking propagation table to learn coral husbandry. You need a tank that holds its parameters, a modest stocking plan, and the discipline to let the system stay boring for a while.
The core fix behind most frag-tank problems
When something looks off, ask these questions in order:
- Has salinity drifted?
- Has alkalinity moved?
- Is detritus collecting somewhere?
- Has feeding changed?
- Has evaporation changed?
- Did I add too much too fast?
- Did a new frag introduce a pest or algae problem?
Can a frag tank run with corals only, no fish?
Yes. A frag tank can run with corals only if it still has real biological filtration, adequate flow, and a deliberate nutrient plan. The main tradeoff is that fishless systems remove an easy source of nutrient input, so you may need to pay closer attention to whether the tank is becoming too lean.
For beginners, coral-only is possible, but it is not “ignore it and it will balance itself.” You still need bacterial surface area, testing, and regular observation. If you choose fishless, simplicity is your friend: fewer moving parts, slower stocking, and clearer trend tracking.
What corals are best for a beginner frag tank?
Soft corals are the easiest starting point for most beginners. Zoanthids, mushrooms, and many leather corals usually offer a wider margin for error than SPS in a new system. They also teach useful lessons about placement, flow, recovery, and nuisance algae without demanding razor-thin stability on day one.
Once the tank has shown that it can stay stable, hardy LPS can be a reasonable next step. SPS are better treated as a later project rather than as the first proof that the tank is “real.”
Do frag tanks need a lid or sand bed?
Usually, no sand bed is required, and many frag tanks are run bare bottom because it makes detritus easier to spot and siphon. But “no sand” is not the same thing as “sand is wrong.” It depends partly on what else lives in the tank.
The lid question is different. If fish are present, a cover becomes much more important. Reef Directory’s species guides for the pink-streaked wrasse and yellow coris wrasse both treat jumping protection as important, and the yellow coris also needs fine sand. So the short answer is:
- sand bed: optional, often omitted in dedicated frag systems
- lid: optional for coral-only, much more important if fish are present
How shallow should a frag tank be?
Shallow enough that maintenance stays easy.
For most beginners, that means a tank you can reach into comfortably, inspect from above, and light without fighting a deep water column. In hobby discussions, tanks around 16 inches tall or less are often favored for this kind of work, but that is best treated as a practical benchmark rather than a strict requirement. If you can reach the bottom, recover dropped plugs quickly, and keep the whole rack area evenly usable, you are in the right range.
When can I add the first coral frag?
Only after the tank has fully cycled and then held salinity at 1.025–1.026, alkalinity at 8.3–9.0 dKH, calcium at 400–450 ppm, and magnesium at 1250–1350 ppm for two straight weeks (Reef Directory setup guidance).
If you already added a cleanup crew or a single hardy fish, still leave time between additions. In a frag tank, patience is part of filtration. A stable, unexciting tank is exactly what you want before the first frag arrives.