
How to Set Up a Reliable Water-Making Station for Your Reef Tank
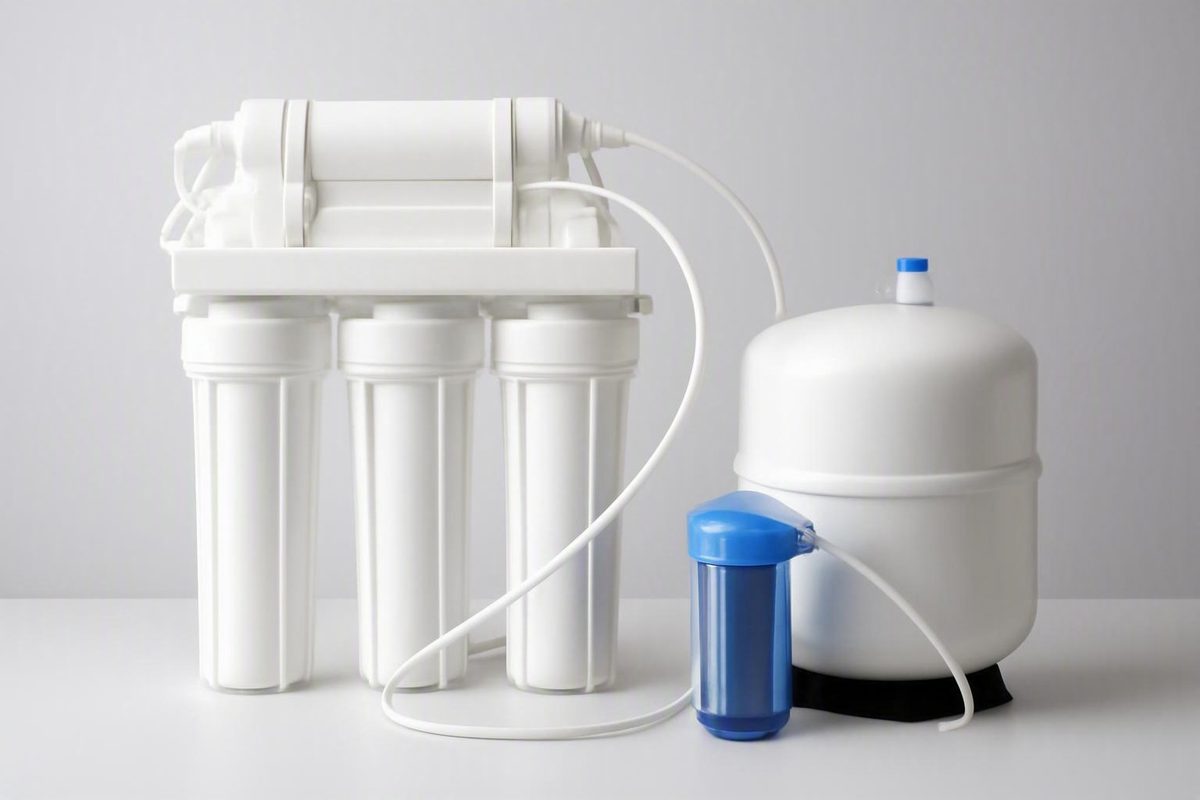
A portable aquarium connection may need little plumbing, while a household system with a feed adapter, waste connection, faucet, tank and drilling may take longer.
A reliable RO installation begins before you cut tubing or open household plumbing. Identify the exact system, find its manual, verify that the available cold-water connection and operating pressure are compatible, and decide where both product water and concentrate will go.
This guide prioritizes aquarium RO/DI systems for reef keepers, including portable arrangements for renters and small spaces. Household drinking-water RO systems are included only to help readers identify them and understand where their layouts differ. Because plumbing, drainage, sanitation, and installation requirements vary, the system manual and any applicable local requirements control.
Start by identifying what kind of RO system you have
Use this decision tree before doing anything else:
-
Does the system dispense drinking water through a small faucet and use a pressure tank? You probably have a household point-of-use RO system. It may include sediment and carbon prefilters, an RO membrane, a storage tank, a dispensing faucet, and a post-RO carbon cartridge.
-
Does the system send purified water through loose tubing to a bucket or reservoir and include a DI-resin stage? You probably have an aquarium RO/DI system. Final product water normally goes to a collection vessel rather than a drinking-water faucet.
-
Does it have a pump, electronic controls, an integrated faucet, an unfamiliar tank arrangement, multiple membranes, or no obvious DI stage? Treat it as another configuration. Stop and find the exact documentation rather than adapting a generic diagram.
For a typical aquarium system, the functional path is:
- Feed water enters the prefilters.
- Prefiltered water reaches the RO membrane.
- The membrane separates the flow into RO product water and concentrate.
- Concentrate, often called wastewater, goes to an appropriate drain.
- RO product water may pass through a DI stage.
- Final RO/DI product water goes to a clean collection vessel.
A household drinking-water RO system is not automatically equivalent to aquarium RO/DI. A post-RO carbon cartridge may be part of a household dispensing system, but it is not a deionization cartridge. Confirm the media in each housing instead of counting housings or relying on a sales description.
Before continuing, locate the manual for the exact model and revision. It should control:
- Tubing functions and sizes
- Fitting types
- Flow-restrictor and flush-valve orientation
- Permitted pressure
- Cartridge and membrane installation
- Startup flushing and discard requirements
- Shutdown and storage procedures
Do not assume tubing colors are standardized. For example, one Bulk Reef Supply five-stage system identifies red as feed, blue as product, and black as wastewater; the same instructions warn that connecting the system to hot water may irreversibly damage its membrane (Bulk Reef Supply five-stage instructions).
A D-D aquarium unit instead identifies white as feed, blue as product, and orange as waste (D-D installation guide). These are product-specific examples, not a general color code.
Throughout this guide, lines are therefore described by function:
- Feed
- RO product
- Concentrate or wastewater
- DI input
- Final product
If the tubing is not already labeled, trace each line from its physical port against the manual and tag both ends. This reduces the risk of confusing concentrate with product water or connecting feed water to the wrong stage.
Choose between a permanent, portable, or remote installation
Every RO or RO/DI station needs four basic elements:
- An appropriate cold-water source
- A suitable destination for concentrate
- A clean product-water vessel or dispensing point
- Enough access to inspect and service the equipment
The best layout is not necessarily the most permanent. It is the one that provides compatible connections, visible and controllable drainage, practical maintenance access, and a realistic overflow plan.
Permanent under-sink installation
This layout is common for household drinking-water RO and can also accommodate an aquarium unit when the manufacturer supports the selected connections. The module mounts inside a cabinet, feed water comes from an approved cold-water adapter, and concentrate goes to an approved waste connection.
A household system may also need a pressure tank and dedicated faucet. An opening previously used by a soap dispenser or sprayer may sometimes accept the RO faucet, but only if the faucet dimensions, mounting thickness, and surrounding clearance match. Do not drill or enlarge an opening based on a generic dimension.
Under-sink equipment can be difficult to service. Before mounting the module, check whether you can:
- Close the feed
- Reach tubing releases and valves
- Remove every filter housing
- Access the membrane housing
- Place a container beneath the unit
- Read installed gauges or meters
- Inspect connections behind the module
Portable faucet or utility-sink connection
A portable aquarium station uses a manufacturer-approved faucet diverter, hose-bib adapter, or utility-sink connection. The unit is connected when water is needed and shut down or disconnected afterward.
This arrangement can avoid permanent drain and countertop modifications. It does not remove the need to verify that the connection fits, monitor the unit while it operates, secure the concentrate line, and check any lease or building restrictions that may apply.
A portable unit can be mounted on a solid board or bracket to keep the housings together. Preserve enough clearance to remove the filter bowls, and make sure the assembly cannot tip when its tubing is moved or pressurized.
Remote wall, shelf, utility-room, or basement station
A remote station may provide better service access and space for a larger collection vessel. Its disadvantages include longer tubing paths, less visible leaks, and possible exposure to unsuitable temperatures.
Do not install the unit where it may freeze. Secure the module and support tanks or reservoirs independently rather than allowing their weight to bear on tubing or fittings. One distributor notes that the filled storage tank used with its household system can weigh more than 30 pounds (H2O Distributors installation guide).
Wall-mounted, shelf-mounted, shower-drain, bucket, and remote-reservoir arrangements frequently appear in aquarium forums. Treat them as layout inspiration only. Photographs do not establish fitting compatibility, operating pressure, structural support, drainage requirements, or overflow protection.
Whichever layout you select, mentally perform a complete cartridge change before mounting anything. If you cannot reach a housing, catch spilled water, release tubing, or inspect the back of the module, revise the layout.
Complete the pre-installation compatibility check
Complete this worksheet before turning off the water:
| Field | Your installation |
|---|---|
| Exact manufacturer and model | |
| System type: drinking-water RO or aquarium RO/DI | |
| Exact manual or installation document | |
| Feed-water connection type | |
| Feed tubing outside diameter | |
| Product tubing outside diameter | |
| Concentrate tubing outside diameter | |
| Adapter and fitting sizes | |
| Cold-water shutoff location | |
| Concentrate destination | |
| Mounting surface and fasteners | |
| Available operating pressure | |
| Model’s permitted pressure range | |
| Electrical accessories, if any | |
| Tank or collection-vessel capacity | |
| Planned batch volume | |
| Overflow destination or shutdown method | |
| Housing-removal clearance | |
| Applicable property or local restrictions checked |
Measure the complete installation rather than only the filter bracket. Record:
- Module width, height, and depth
- Tank or collection-vessel dimensions
- Tubing paths
- Access to feed and waste connections
- Clearance required to remove filter housings
- Space for tubing to curve without kinking
- Access needed to inspect valves, meters, and fittings
Inventory the package against the manual. Depending on the model, it may include:
- Filter module and mounting bracket
- Sediment and carbon cartridges
- RO membrane
- DI cartridge or separate DI stage
- Feed-water adapter
- Tubing
- Flow restrictor or flush valve
- Waste connection hardware
- Drinking-water faucet or product outlet
- Pressure tank and tank valve
- O-rings
- Housing wrench
- Clips, locking devices, gauges, or meters
Do not assume that every component shown in a sales photograph is included. Do not substitute a cartridge merely because it fits the housing. Media type, seals, micron rating, capacity, and intended source-water conditions can differ.
Inspect tubing for flattening, cracks, deep scratches, or damaged ends. Compare each adapter with its intended connection before opening household plumbing. Stop if the threads, tubing diameter, or sealing method do not match.
Possible tools include towels, a bucket, an adjustable wrench, a screwdriver, a proper tubing cutter, PTFE tape where the manual permits it, a drill, and material-appropriate bits. These are examples, not a universal list. Express Water likewise directs installers to inventory components, inspect tubing, measure the space, verify pressure conditions, and follow the product manual rather than relying on a generic tool list.
Drilled-hole dimensions are specific to the faucet, drain hardware, and installation material. Published dimensions for one product must not be transferred to another. If drilling could damage the sink or countertop, stop and use an installer familiar with the material.
Used-system inspection
Do not immediately pressurize a used or long-stored system. First check for:
- Missing, flattened, cracked, or hardened O-rings
- Brittle, cut, stained, or kinked tubing
- Broken push fittings or damaged threads
- Cracked or distorted filter housings
- Unknown or long-stored cartridges
- An unknown membrane condition
- Failed pressure gauges or TDS meters
- Missing restrictors, clips, brackets, or housing tools
Replace suspect pressure-bearing or sealing parts before testing. One documented hobbyist case involving a long-stored unit included missing seals, leaks, broken fittings, and failed meters; it is an anecdotal warning, not evidence that every used system has these faults (Reef Central discussion).
Map the water path and apply the essential safety rules
Create a function-based map before making connections:
APPROVED COLD-WATER SOURCE
          │
          ▼
   SEDIMENT PREFILTER
          │
          ▼
    CARBON PREFILTER(S)
          │
          ▼
       RO MEMBRANE
       ┌───────────┐
       │           │
       ▼           ▼
RO PRODUCT     CONCENTRATE
       │           │
       │           └──► APPROVED WASTE DESTINATION
       │
       ├──► DRINKING-WATER TANK / OUTLET
       │        (only if designed for this)
       │
       └──► DI STAGE
                │
                ▼
       FINAL AQUARIUM PRODUCT
                │
                ▼
       CLEAN COLLECTION VESSEL
Your model may contain additional valves, filters, pumps, or branches. This diagram shows functions, not the construction of every system.
Connect only to the cold-water source specified by the manufacturer. Before disconnecting an approved cold-water connection:
- Close the relevant supply valve.
- Open the cold faucet to relieve residual pressure.
- Place a towel and shallow container beneath the work.
- Confirm that flow has stopped.
- Keep the shutoff accessible.
Manufacturer guidance likewise instructs users to shut off the water, open the faucet to release residual water and pressure, and catch remaining water beneath disconnected fixtures (iSpring installation tips).
If the shutoff does not stop the flow, do not work against a live supply. Stop and use an appropriate upstream shutoff only if you are authorized and know how to operate it; otherwise call a plumber.
Route concentrate to the destination approved for the installation. For a temporary aquarium setup, do not leave the tube loose where it can be pulled or displaced. Restrain it without kinking the tubing or changing the outlet arrangement in a way prohibited by the manual.
Concentrate is not purified output. Do not direct it into a reef aquarium, top-off reservoir, or salt-mixing vessel.
Some systems include booster pumps, solenoids, powered monitors, or electronic controls. This guide does not provide an electrical installation procedure. Follow the equipment documentation and use a qualified installer when electrical or wet-location requirements are uncertain.
Permanent installation: feed connection, drain, faucet, and tubing
This section is a planning sequence, not a universal household-plumbing procedure. The exact system manual must specify the approved connections, component positions, startup configuration, and any sanitation procedure. Confirm applicable requirements before modifying supply or drain plumbing.
1. Select and mount the components
Position the module, tank, faucet, and accessible valves before opening any plumbing. Preserve filter-removal clearance and support heavy components independently. Avoid locations where cabinet contents, doors, or hinges can strike tubing.
2. Identify the approved cold-water feed connection
A household under-sink system commonly receives feed water through a model-approved adapter at the cold-water supply. Confirm the fitting type, thread, washer, tubing size, and sealing method before beginning.
Do not use a fitting merely because it appears close in size. If connections do not match or the plumbing is corroded, stop rather than forcing the assembly. Self-piercing valves, angle-stop adapters, and similar fittings are not suitable for every pipe, system, or location.
3. Plan the faucet, if the system uses one
A household drinking-water RO system commonly uses a dedicated dispensing faucet. A compatible existing accessory opening may be available, or the selected system may require another arrangement.
Confirm:
- Required mounting diameter
- Permitted surface thickness
- Underside clearance
- Faucet orientation
- Compatibility with the sink or countertop material
Aquarium RO/DI normally sends final product water directly to a collection vessel. Do not add a pressure tank, drinking-water faucet, or additional branch unless the manufacturer supports that configuration.
4. Identify the approved concentrate connection
Some household systems specify a drain saddle. Where that hardware is permitted and required by the selected manual, one distributor places it on compatible drainpipe above the P-trap and away from a garbage disposal. The same guide calls for cleanly cut, fully inserted, pull-tested quick-connect tubing and inspection for leaks after pressurization (H2O Distributors installation guide).
Another manufacturer recommends a horizontal section or curve where possible to reduce audible dripping. That is product guidance, not proof that a saddle is acceptable for every drainpipe or jurisdiction (iSpring installation tips).
Do not drill a drainpipe until you have confirmed the pipe material, hardware instructions, surrounding clearance, and applicable requirements. If any of those points remains uncertain, use a qualified plumber.
5. Route and connect tubing
Plan gentle tubing paths away from hot surfaces, sharp edges, hinges, and electrical equipment. Leave enough length for service without creating loose coils that can be snagged.
Where the manual specifies a push-fit connection:
- Cut the tubing cleanly and squarely.
- Confirm that the end is round and undamaged.
- Insert it straight into the fitting.
- Push it fully past the initial resistance.
- Pull back gently to confirm retention.
- Inspect the joint during controlled pressurization.
Use the fitting’s specified release method when removing tubing. Do not pull it out by force.
6. Install cartridges and the membrane as directed
Some systems arrive assembled; others require cartridge or membrane installation. Follow the stated flow direction, seal position, protective-packaging removal, and prefilter-flushing sequence. Use seal lubricant only when the manual specifies an approved product.
7. Prepare for commissioning
Set tank valves, flush valves, DI routing, and outlets to the exact startup positions stated in the manual. Route all startup water to an appropriate discard destination. Do not assume normal production positions are correct for commissioning.
Stop work and seek qualified help if:
- A shutoff valve will not close
- Fittings, tubing, or threads are incompatible
- Plumbing is heavily corroded or deteriorated
- The permitted waste connection is unclear
- A fragile or expensive surface must be drilled
- The job includes electrical work outside your competence
- A correctly remade connection continues to leak
Portable aquarium RO/DI installation for renters and small spaces
A portable setup can avoid permanent countertop or drain work, but it still needs a compatible feed, stable equipment placement, controlled drainage, and an overflow plan.
1. Select a manufacturer-approved temporary feed
Suitable options may include a hose-bib adapter, utility-sink connection, or faucet diverter supplied or approved for the system. Bulk Reef Supply documents both a garden-hose or utility-sink adapter and a faucet diverter for one four-stage model, while directing product water to a clean container and wastewater to the drain (BRS four-stage RO/DI guide).
Those fittings are specific to the cited system. Do not assume they fit another faucet or RO/DI unit.
Verify that the source delivers cold water. If the faucet mixes hot and cold water internally, use only a connection and operating procedure that prevent hot water from reaching the membrane.
2. Place or mount the unit securely
Set the unit in the operating orientation permitted by the manual. Keep it away from the edge of a counter or sink. If it is mounted on a board, use secure fasteners and preserve housing-removal clearance.
Do not suspend the unit from its tubing.
3. Attach the feed while the supply is off
Fit the approved adapter without forcing the threads. Confirm that required washers or gaskets are present. Attach the feed tubing by the method stated for that fitting and perform the specified retention check.
4. Control both outgoing lines
Route final product water into a clean, stable collection vessel. Place the concentrate tube in the selected sink or drain and physically restrain it so ordinary movement cannot dislodge it.
Keep the outlets visibly separated and label them by function. Do not rely solely on color.
5. Open the source slowly
Remain beside the unit during its first run. Watch the feed adapter, filter bowls, membrane housing, valves, meters, and tubing connections.
A removable connection does not make unattended operation safe. It also does not settle questions about a lease, building policy, or property modification. Check any restrictions that apply to the installation.
6. Match storage to actual use
Estimate:
- Routine evaporation top-off
- Water-change volume
- Salt-mixing time
- The largest planned batch
- The weight and footprint of the filled vessel
- Available spill containment
There is no universal reservoir size for a reef aquarium. Select a vessel that fits the available space, remains manageable when full, and provides headroom above the planned batch.
Under-sink tees, refrigerator-line kits, angle-stop adapters, ball-valve connections, shower drains, and remote reservoirs appear in hobbyist discussions. They are possible layouts, not validated instructions. Any such arrangement still requires manufacturer and plumbing compatibility checks.
Portable shutdown checklist
- Close the feed-water supply.
- Follow the manual’s pressure-relief procedure.
- Set flush, bypass, and other valves to their specified storage positions.
- Keep the membrane in the required storage condition.
- Disconnect temporary adapters only after pressure is relieved.
- Drain or cap loose tubing as directed.
- Confirm that no line can siphon into or out of a vessel.
- Check the adapter, tubing, surrounding surface, and floor for delayed drips.
- Store the unit away from freezing temperatures and direct sunlight if the manual requires it.
Commission the system before collecting usable water
Commissioning is a controlled startup, not simply opening the feed and filling a bucket.
First-run checklist
- [ ] Confirm every tube by function.
- [ ] Verify cartridge and membrane installation.
- [ ] Check every valve against the manual.
- [ ] Secure the concentrate outlet.
- [ ] Route startup product water to a discard destination.
- [ ] Isolate the tank or DI stage if the model requires it.
- [ ] Open the feed slowly.
- [ ] Inspect every housing, cap, adapter, valve, and fitting.
- [ ] Complete the exact flushing and discard procedure.
- [ ] Recheck the unit after sustained pressurization.
- [ ] Record pressure and TDS readings where available.
If a leak appears, close the feed immediately. Follow the manual’s depressurization procedure, dry the area, identify the actual source, and remake or replace the affected part before testing again. Do not randomly tighten components while the system remains pressurized.
Initial flushing may remove carbon fines and membrane preservation materials, but the required procedure varies substantially:
- Bulk Reef Supply specifies a one-hour initial run with startup water discarded for its cited five-stage aquarium unit (BRS five-stage instructions).
- D-D describes flushing its prefilters and then discarding at least five gallons after installing the membrane in its aquarium unit (D-D installation guide).
- Express Water instructs owners of its household system to flush four full tanks before use (Express Water installation guidance).
These procedures apply to different products. Do not combine them, average them, or select the shortest. Follow the exact manual and discard all water it identifies as startup water.
Some aquarium systems include or support a DI bypass that diverts initial RO product away from the DI stage until the post-membrane reading declines. This may reduce unnecessary use of DI resin, but it is appropriate only when the system is designed and documented for that routing. Do not move tubing or add a bypass based solely on an unrelated diagram.
After an idle period, some product-specific guidance anticipates temporarily elevated TDS and directs the user to run or flush the system before testing. The required valve positions and operating time remain model-specific.
Record available measurements:
| Commissioning measurement | Result |
|---|---|
| Feed pressure | |
| Feed-water TDS | |
| Post-membrane TDS | |
| Final DI TDS | |
| Flush duration or volume | |
| Product discarded | |
| Initial leak check | Pass / Corrected |
| Sustained-pressure leak check | Pass / Corrected |
| Notes |
Do not impose a generic acceptable pressure or TDS value on every system. Compare readings with the manual, membrane specification, operating conditions, and your own established baseline.
Do not use product water until the manufacturer’s commissioning and discard requirements are complete. For aquarium use, RO/DI water is starting water; top-off water or mixed saltwater must still be prepared and verified for its intended use before reaching livestock.
Validate output, prevent overflows, and know when to get help
Separate hands-on installation from the time required to produce usable water. Culligan estimates that its professional installations generally take one to two hours, but explicitly notes that timing varies (Culligan installation overview).
Express Water publishes a two-hours-or-less installation estimate for one of its DIY systems. Its separate flushing process can take substantially longer, so neither figure is a universal promise (Express Water installation guidance).
Inspect every connection during gradual pressurization and again after the system has operated under pressure. Use a dry finger or paper towel around fittings, and inspect behind the module, beneath housings, and at the feed and waste connections.
For an aquarium station, confirm that the collection vessel is:
- Clean and reserved for appropriate water handling
- Stable on a level, load-bearing surface
- Large enough for the planned batch
- Covered where practical without blocking required venting
- Positioned away from electrical equipment
- Paired with a deliberate overflow or shutdown plan
Open collection vessels can overflow. Timers, float valves, leak detectors, solenoids, and automatic shutoffs may reduce risk, but they are not fail-safe. Product-specific BRS guidance recommends overflow precautions and monitoring while also directing users to shut off the water supply after production (BRS four-stage RO/DI guide).
| Symptom | Bounded response |
|---|---|
| Leaking push fitting | Close the feed and depressurize as directed. Check for a square, undamaged tube end and full insertion. Replace damaged parts instead of repeatedly forcing the joint. |
| Low product output | Compare operating pressure and conditions with the manual. Verify valve positions and inspect the documented water path for restrictions or kinks. |
| High startup TDS | Complete the model’s flushing procedure, confirm meter placement, allow the stated startup period, and retest. |
| Noisy drain | Confirm that the concentrate tube and any approved waste hardware are positioned as the selected manual specifies. Do not casually relocate drilled hardware. |
| Overflowing vessel | Shut off the feed immediately, contain the spill, and adopt a larger vessel, safer overflow destination, or verified control arrangement. |
| Repeated housing leak | Stop using the system. Inspect the housing, threads, O-ring, seating surface, and permitted pressure; replace damaged parts or seek service. |
| Pressure outside the model’s range | Stop and compare the reading with the manual. Do not add a pump or regulator based only on generic advice. |
Actual production can be lower than the nominal gallons-per-day rating. Operating pressure, feed-water temperature, source-water conditions, membrane condition, and restrictor configuration can affect output. Measure how long your system takes to produce a known volume instead of planning an unattended batch from the label alone.
Seek qualified help when the project involves:
- Drilling a sink or countertop
- Uncertain waste-connection requirements
- Incompatible or deteriorated plumbing
- A shutoff that will not close
- Electrical pumps or controls outside your competence
- Repeated leaks
- Unexplained pressure problems
- Work restricted by applicable property or local rules
Finish by creating an installation record:
| Installation record | Entry |
|---|---|
| Manufacturer and model | |
| System type | |
| Feed connection | |
| Concentrate connection | |
| Product-water destination | |
| Installation date | |
| Commissioning date | |
| Feed pressure | |
| Feed TDS | |
| Post-membrane TDS | |
| Final DI TDS | |
| Flush procedure completed | |
| Discard duration or volume | |
| Initial leak check | |
| Sustained-pressure leak check | |
| Sediment cartridge installation date | |
| Carbon cartridge installation date | |
| Membrane installation date | |
| DI-resin installation date | |
| Notes and corrected issues |
The durable principle is parameters first: identify the exact system, verify the site and connections against its manual, label every line by function, pressurize slowly, flush as directed, and record pressure and TDS before relying on the output. A portable reef-water station may avoid permanent modifications, but it still needs controlled drainage, active overflow prevention, and careful leak testing. Stop and use a qualified professional when the project involves uncertain plumbing, electrical accessories, or risky drilling.
Frequently asked questions
How long does RO installation take before the water is usable?
Hands-on installation and time to usable water are different. A portable aquarium connection may require little plumbing, while a household system involving a feed adapter, waste connection, faucet, tank, and drilling may take longer.
As a vendor-specific example, Culligan estimates one to two hours for its professional installation service, with timing dependent on the installation (Culligan installation overview). That does not include every possible model or commissioning routine.
After installation, the unit must still be leak-tested, flushed, and verified. Depending on the model, this may involve discarding a specified volume, filling and emptying tanks, or waiting for readings to settle. Plan in phases rather than relying on one completion time.
Can I install an aquarium RO/DI system in an apartment without permanent plumbing?
Often, a manufacturer-approved faucet diverter, utility-sink adapter, or hose-style connection can support portable operation without a permanent drain saddle or dedicated dispensing faucet.
Place the unit securely, use an appropriate cold-water source, send final product to a clean vessel, and restrain the concentrate tube at the selected drain. Stay present while the unit operates, particularly during initial batches.
Portable does not mean risk-free or automatically permitted. Check the lease or building rules that apply, and do not modify under-sink plumbing merely because a similar-looking arrangement appeared in a forum.
Does an RO/DI system need a booster pump?
Not automatically. The answer depends on the model’s permitted operating pressure and the pressure available while water is flowing.
Measure operating pressure with suitable equipment and compare it with the exact manual. Before considering a pump, verify that valves are in their documented positions and that tubing is not kinked or incorrectly routed.
If the manufacturer specifies a booster pump, follow the pump’s plumbing and electrical instructions. Use a qualified installer when the electrical work or pressure problem is outside your competence.
Can RO/DI wastewater be put back into a reef aquarium?
No. Do not direct the concentrate line into the reef aquarium, top-off reservoir, or salt-mixing vessel. Bulk Reef Supply’s aquarium instructions identify that stream as wastewater and specifically state that it should not be used in aquariums.
Route concentrate to the waste destination approved for the installation. Do not assume that it is suitable for another use without evaluating that use separately.
Do I need a separate faucet for an RO system?
It depends on the system.
A household drinking-water RO system commonly uses a dedicated dispensing faucet and often a pressure tank. A compatible soap-dispenser or sprayer opening may sometimes be used if its dimensions and clearance match the selected faucet.
An aquarium RO/DI system usually sends final product tubing directly to a collection vessel. A faucet diverter may instead act as a removable feed connection, which is different from a dedicated faucet that dispenses purified water.
Follow the exact manual. Do not add a faucet, pressure tank, or drinking-water branch to an aquarium unit unless the manufacturer supports that configuration.