
Stones for a Fish Tank Guide
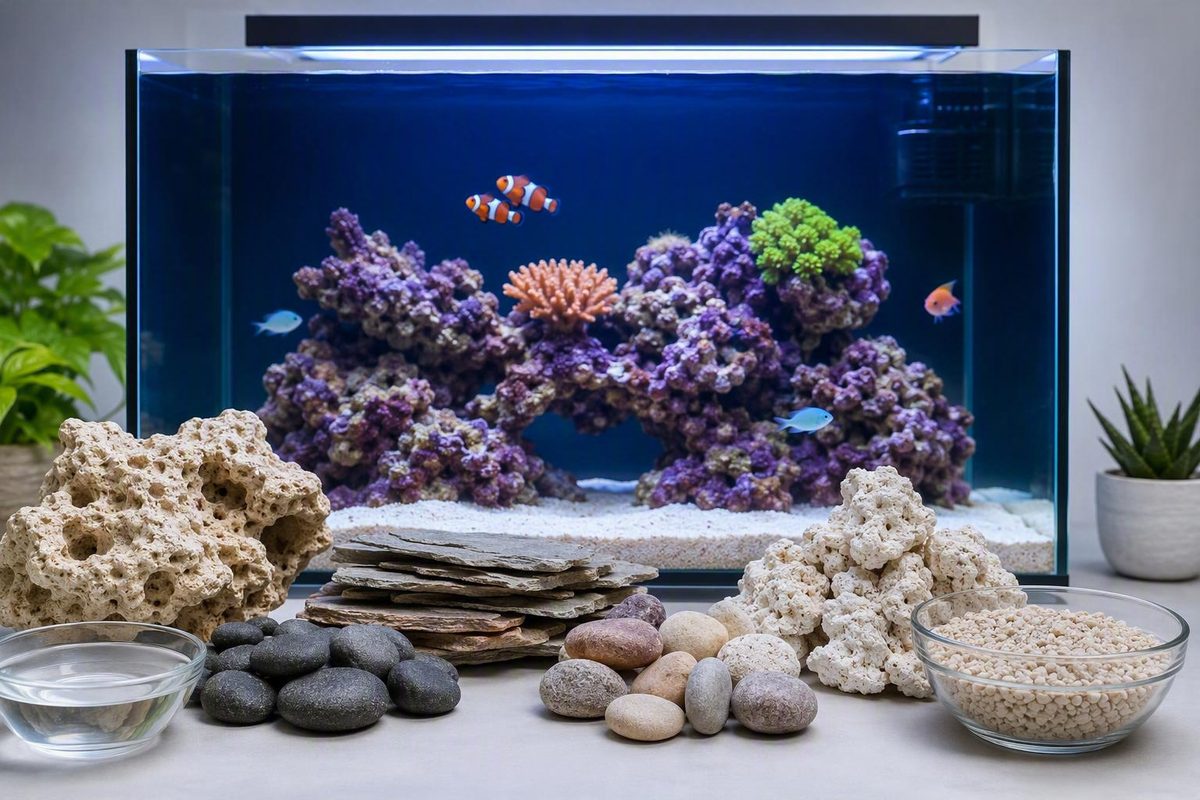
Limestone and marble are calcareous stones that can slowly release carbonate minerals while sitting in the water, pushing both pH and hardness upward.
Stones for a Fish Tank Guide
Overview
Suitable stones for a fish tank are ones that fit your water-chemistry goals, carry no obvious physical hazards such as sharp edges, and have been identified, tested, and cleaned before they go in. Aquarium guidance commonly recommends non-porous, pH-neutral rocks free of sharp edges, while highly calcareous rocks such as limestone or marble call for caution because they can affect water quality.
The most common mistake is choosing by appearance alone. A beautiful stone can still raise pH and hardness, crumble, trap debris, or scrape fish. This guide walks through the full workflow: setting compatibility criteria, matching stone traits to your tank’s goal, understanding how rocks change water, deciding between purchased and collected stones, testing and cleaning, secure placement, and what to monitor afterward.
Start with compatibility before appearance
The practical rule is simple: rule out incompatible stones first, then choose the best-looking option from what remains. School of Scape’s aquarium rock guide summarizes the baseline well — look for rocks that are non-porous, pH neutral, and free of sharp edges. Each of those criteria targets a different risk: porous or crumbly stones can shed material or harbor trapped substances, non-neutral stones can shift water chemistry, and sharp edges can injure fish, especially ones that rest on or dig around the hardscape.
Water chemistry is the risk that is hardest to see. The Spruce Pets advises avoiding rocks that are highly calcareous, such as limestone or marble, because they can harm your fish. Calcareous simply means the stone contains carbonate minerals that can dissolve into the water and push pH and hardness upward over time — a change your fish experience even if the tank looks perfect.
Physical safety matters beyond chemistry, too. Before any stone enters your shortlist, check for a few red flags:
- Sharp or jagged edges at fish level, particularly near the substrate where bottom-dwellers move
- Crumbling, flaking, or visible rust-colored or metallic veins that suggest unstable or unknown composition
- Shapes that create unstable stacks, tight debris traps, or pockets that are hard to clean
- Any residue, coating, or smell suggesting the stone has been treated or contaminated
Finally, treat an “aquarium safe” label as one input, not a guarantee. A label typically tells you the stone was sold for aquarium use; it does not tell you whether the stone suits your specific water goals, your livestock, or your layout. Apply the same compatibility and inspection checks to labeled stones that you would apply to anything else.
Match the stone to the tank’s goal
Choose the stone that fits what you are trying to achieve, not the one that looks best in a photo. Most decisions come down to a handful of traits the aquarium sources consistently raise: whether the stone is pH neutral or mineral-influencing, whether its edges are smooth or sharp, what role it plays in the layout, and how confident you can be about what it actually is.
A few bounded examples show how this works in practice. If your goal is a stable community-style tank where you do not want the hardscape changing the water, prioritize stones described as pH neutral and non-porous. If your setup intentionally runs harder, more mineral-rich water, a calcareous stone’s tendency to release carbonate may be less of a conflict — but you still need to test and monitor rather than assume. If bottom-dwelling fish will spend time against the hardscape, smoother stones reduce injury risk compared with jagged, textured pieces. And if the priority is a dramatic aquascape, textured stones offer more visual structure but demand more attention to edges, stability, and cleaning access.
The matrix below translates those criteria into a quick comparison. It is deliberately qualitative — the supplied sources do not support exact parameter ranges or species-specific guarantees, so treat it as a starting filter, not a final verdict.
| Your priority | Look for | Be cautious about | Next step before buying or using |
|---|---|---|---|
| Stable water chemistry | Stones described as pH neutral and non-porous | Calcareous stones such as limestone or marble | Test for carbonate reaction; monitor pH after adding |
| Sensitive bottom-dwellers | Smooth, rounded stones without sharp edges | Jagged, sharp-textured pieces at substrate level | Run your hand over every surface; reject anything abrasive |
| Aquascape structure and texture | Named aquascaping stones with strong shapes | Debris traps, unstable stacks, hidden sharp points | Plan placement and stability before adding water |
| Low uncertainty | Purchased stones with known identity | Outdoor-collected stones of unknown composition | Identify, test, and clean regardless of source |
Whatever row fits your tank, the action is the same: shortlist by trait first, then confirm with the testing and cleaning workflow later in this guide.
Common stone types mentioned in aquarium guides
Recognizing the names that appear across aquarium guides makes shopping easier, but treat them as categories to evaluate rather than universal recommendations. School of Scape lists eight of the most common rock decorations used in aquariums and highlights granite, quartzite, slate, and lava rock as popular choices that align with the non-porous, pH-neutral criteria. Lava rock is a frequent aquascaping pick for its texture, while slate offers flat, stackable surfaces — though flat stones with sharp cut edges still deserve an edge check.
Aquascaping-focused guides such as Aquascaping Love discuss dedicated hardscape stones — names like Seiryu Stone and Dragon Stone appear throughout the aquascaping field — and cover how rocks fit into layouts alongside driftwood and substrate. These stones are chosen mainly for shape and texture, so they need the same compatibility checks as anything else; some popular aquascaping stones contain minerals that can influence water, which is exactly why testing matters even for stones sold specifically for aquascaping.
On the caution side, The Spruce Pets singles out highly calcareous materials — limestone and marble are the named examples — as rocks to avoid because they can harm fish through their effect on water. River rock and sandstone also appear in aquarium discussions: smooth river stones are appealing for their rounded edges, while softer or more porous stones warrant closer inspection for crumbling. Whichever name is on the bag or the riverbed, the identification and testing steps below apply before the stone touches your tank.
How stones can change aquarium water
Stones change aquarium water mainly by dissolving minerals into it, and the most important case is carbonate. When a calcareous stone — one containing carbonate minerals, as in limestone or marble — sits in water, it can slowly release those minerals and push pH and hardness upward. The Spruce Pets flags exactly this risk, advising against highly calcareous rocks because the resulting water changes can harm fish. In plain terms: pH measures how acidic or alkaline the water is, and hardness (often discussed as GH for general hardness and KH for carbonate hardness) measures dissolved mineral content. Fish adapted to soft, low-mineral water are the ones most exposed when a stone quietly raises both.
This is why “pH neutral” appears so often as a selection criterion. A stone that does not react with the water leaves your parameters where you set them, which makes the rest of tank management more predictable. A reactive stone, by contrast, becomes a permanent, uncontrolled input into your water chemistry for as long as it stays in the tank.
Testing helps you identify the risk, but no single test is a complete guarantee. The Spruce Pets’ guide to outdoor rocks covers testing and identifying rocks before use, and the common home check is an acid reaction test: a few drops of vinegar on the stone that produce fizzing suggest carbonate content and a likely effect on pH and hardness. The limitations matter as much as the test. Fizzing indicates carbonate is present, but the absence of fizzing does not prove a stone is inert or free of other problems — it only clears one specific concern. That is why the more reliable signal is your own water: test pH and hardness before adding a stone, then keep testing afterward. If parameters drift after a new stone goes in, the stone is the first suspect, and continued monitoring — covered later in this guide — is what actually confirms whether it belongs in your tank.
Store-bought aquarium stones vs outdoor-collected stones
If you want the lowest-risk path, buy stones sold for aquarium use; if you want to collect outdoors, accept that you take on the identification and testing work yourself. The Spruce Pets frames outdoor gravel and rocks exactly this way — usable, but only after you understand the risks and test the material properly.
The core difference is uncertainty. A purchased aquascaping stone typically comes with a known identity, consistent appearance across pieces, and no history of sitting in contaminated soil or runoff. An outdoor-collected stone is a mystery until you identify it: it may be calcareous, it may carry residues from its environment, and its composition can vary even between similar-looking pieces from the same spot. The Spruce Pets’ guide devotes sections to which rocks are unsafe and where to find outdoor rocks precisely because sourcing location and rock identity drive most of the risk.
Convenience and consistency also differ in predictable ways:
- Purchased stones are easier to match visually across a layout, easier to identify, and quicker to prepare — but selection depends on what retailers stock, and a store label still does not replace your own compatibility checks.
- Collected stones offer unique shapes and free material, but require careful identification, more thorough testing and cleaning, and a willingness to reject pieces that fail inspection.
The supplied sources do not provide price data, so treat cost qualitatively: collecting saves purchase cost but costs time and adds risk. Whichever route you choose, the preparation workflow below is not optional — it is simply longer and more critical for collected stones. The label on a bag of purchased stone tells you what the seller intended; only your own inspection and testing tell you whether the stone fits your tank.
Test, clean, and prepare stones before they go in
Prepare every stone through the same sequence, whether it came from a store or a riverbank. The Spruce Pets frames its outdoor-rock guidance around testing, identifying, and using rocks safely, and Aquascaping Love treats preparation as a standard step before hardscape material enters an aquascape. The steps below combine those themes into one ordered workflow. Treat it as risk reduction, not a guarantee — each step removes a category of problem, and skipping one leaves that category unchecked.
- Identify the stone as best you can. Knowing whether you are holding slate, granite, quartzite, or an unknown calcareous rock determines how much caution the rest of the process needs. If you cannot identify a collected stone at all, weigh whether it is worth the added uncertainty.
- Inspect it physically. Check for sharp edges, crumbling surfaces, flaking layers, metallic or rust-colored veins, and any coating or residue. Reject stones that fail this inspection — no amount of cleaning fixes an unstable or sharp stone.
- Rule out known-risk materials. Set aside anything highly calcareous, such as limestone or marble, unless your setup deliberately calls for hard, alkaline water and you plan to monitor closely.
- Test for carbonate reaction. Apply a few drops of vinegar to a dry spot on the stone. Fizzing suggests carbonate content and a likely effect on pH and hardness. Remember the limit: no fizz clears one risk, not all of them.
- Soak the stone separately. Place it in a container of dechlorinated water — never in the tank — for several days. This lets loose material release away from your fish and gives you something to test.
- Test the soak water. Check pH and hardness at the start and again after the soak. A meaningful upward drift suggests the stone is dissolving minerals and deserves a rethink for soft-water setups.
- Scrub without soap or chemicals. Use a clean brush and plain water to remove dirt, algae, and loose particles. Soaps and detergents leave residues that are themselves a hazard, so keep the cleaning purely mechanical.
- Add the stone and keep watching. Only after the stone passes every step does it go in the tank — and even then, the monitoring section below still applies.
The order matters. Testing before soaking, and soaking before scrubbing, means you invest cleaning effort only in stones that have already earned a place in your tank.
Place stones securely in the tank
Place stones so they cannot shift, crush anything beneath them, or stress the glass — stability is the placement rule everything else builds on. Aquascaping Love describes the typical sequence: a layer of substrate goes into the aquarium first, then rocks and driftwood are added on top. That order lets you seat each stone firmly and see how it interacts with the substrate before water, plants, and fish complicate adjustments.
Think about three things as you position each piece. First, protection: heavy stones concentrate weight, so seat them deliberately rather than dropping them, and make sure large pieces rest stably rather than balancing on small contact points against the glass. Second, stability over time: fish that dig can undermine a stone’s footing, so a stone that only stays upright because of loosely packed substrate is a future problem. Press larger stones down to a firm base and test each one with a gentle push before moving on. Third, access: leave enough space around and behind stones to clean, and avoid arrangements that create narrow pockets where debris collects out of reach.
Stones are habitat as well as decoration. Well-placed rocks create hiding places, shelter, and territory boundaries that many fish actively use, and they anchor the visual structure of an aquascape alongside substrate and driftwood. The counterweight is swimming room: a tank packed with hardscape looks dramatic but leaves fish little open water. There is no supported universal rule for how many stones to use, so let two practical checks decide quantity — every stone should be individually stable and cleanable, and your fish should still have clear, open swimming space at their preferred levels. If either check fails, remove a stone rather than rearranging around the problem. Once the layout is set, watch it: placement is not finished until the arrangement has proven stable with water and livestock in the tank.
Monitor stones after setup
Adding the stones is not the end of the job — the first weeks after installation are when hidden problems show themselves. The most important habit is regular water testing. Because calcareous or reactive stones can raise pH and hardness gradually, as The Spruce Pets’ outdoor-rock guidance warns, track those parameters after any new stone goes in and compare them against your pre-installation readings. A slow upward drift with no other change in the tank points strongly at the new hardscape.
If pH does rise after adding a stone, respond in stages rather than panicking. Retest to confirm the trend, rule out other causes, and if the drift continues, remove the suspect stone and watch whether parameters stabilize. A stone that keeps pushing your water away from your target does not belong in that tank, however good it looks — and removal is a normal, low-drama fix.
Alongside water tests, build a quick visual check into routine maintenance:
- Stability: confirm stones have not shifted, settled, or been undermined by digging fish
- Condition: look for crumbling, flaking, or new discoloration that suggests the stone is breaking down
- Debris and algae: clear detritus from pockets around the hardscape and clean algae buildup before it becomes entrenched
- Livestock: watch generally for changes in fish behavior or condition after a new stone goes in, and investigate rather than ignore them
A stone earns a permanent place in the tank by passing these checks over time, not just by passing the pre-installation tests. If a stone repeatedly traps debris you cannot reach, keeps shifting, or crumbles, treat that as its answer: take it out, reassess, and replace it with something that fits both your layout and your water. Done this way, stones become one of the most reliable, low-maintenance features in the tank — chosen for compatibility first, and appearance a close second.